
SIPA蓄能器气囊更换步骤
4页
1、BLADDERCHANGINGPROCEDURE步骤更换气囊DISMANTLINGTHEACCUMULATORBLADDER拆解蓄能器气囊Isolateanddepressurizetheaccumulatorusingtheisolatingblockordepressurizethehydraulicsystem.Removetheaccumulatorandplaceithorizontallyinaviceoranothersecuringdevice.Protecttheshellsoasnottodamageit.使用阻塞块或液压减压系统来隔离和减低蓄能器中压力。将蓄能器拆下并将其平放在一个夹具或其他安全装置内。确保其外壳不会受到损坏。A. Unscrewtheguardcapfromthechargingvalve(photo1).A. 将保护帽从充气阀上卸下。(见照片1)B. Unscrewthechargingvalveplug(photo2).B. 将充气阀堵头卸下。(见照片2)C. Dischargethegascontainedinthebladderusing
2、achargingandgaugeassemblyuntil0isshownonthemanometer(photo3).Makesurethatthebladderisnotchargedwithnitrogenbycheckingthatthechargingvalveisopen.C. 使用装有标尺的卸压组件将气囊中的气压卸载到压力表指示的Obar(见照片3)。完全开启卸压阀以确认气囊中完全没有氮气。Important:Ifthebladderremainsincontactwiththeanti-extrusionsystem,consultOLAER.注意:如果气囊仍有残留气体,请咨询OLAER。D. Removethesingle-piecechargingvalve(photo4)orthechargingvalvemechanism(photos5/6)orthevalvecore(photo7),accordingtothemodel.D. 依照示例,分别取下卸压阀单件(见照片4)和卸压阀机械装置(见照片5/6)以及阀芯(见照片7)。E. Removethelockn
3、utfromthevalvebodyandthenthenameplate(photos8and9),accordingtothemodel.E. 依照示例,从阀体上拆除锁定螺母和铭牌(见照片8和9)。F. Removethehydraulicventscrewanditsseal(photos1Oand11)accordingtothemodel.F. 依照示例,拆除液压放气螺栓和其密封(见照片1O和11)。G. Loosenthelocknut(photo12).G. 松开锁紧螺母(见照片12)。H. Manuallypushthefluidportbodyintotheaccumulatorshelltoreleasethespacer,O-ringandwasher(photo13andexplodedview).H. 用手将无固定的端口推进蓄能器壳内以松开垫片、O型圈和垫圈(见照片13和分解图)。I. Releasetherubbersplitringfromthefluidportbody.Carefullyfoldittoremoveitfromtheaccumulato
4、rshell(photo14).I. 从无固定的端口上松开橡胶环扣。小心合拢并从蓄能器壳中取出(见照片14)。J. Removethefluidport(photo15).J. 拆除无固定的端口(见照片15)。K. Removethebladdercompletewithitschargingvalvebodythroughthefluidportopening(photo16).L. 将气囊和卸载阀完整地从开启的无固定的端口处取出(见照片16)。CLEANINGANDINSPECTION清理和检查Carefullycleanallthemetallicpartsoftheaccumulatorwithanorganicsolvent.使用有机溶剂仔细清理蓄能器内的所有金属部件。Visuallychecktheconditionofthecomponentsinstalledinsidethefluidport(poppet,springnutanddashpot).认真检查在端口内安装的部件(提升阀、弹簧螺母和缓冲器)状况。Pushthepoppetheadtocheckthatit
《SIPA蓄能器气囊更换步骤》由会员ni****g分享,可在线阅读,更多相关《SIPA蓄能器气囊更换步骤》请在金锄头文库上搜索。
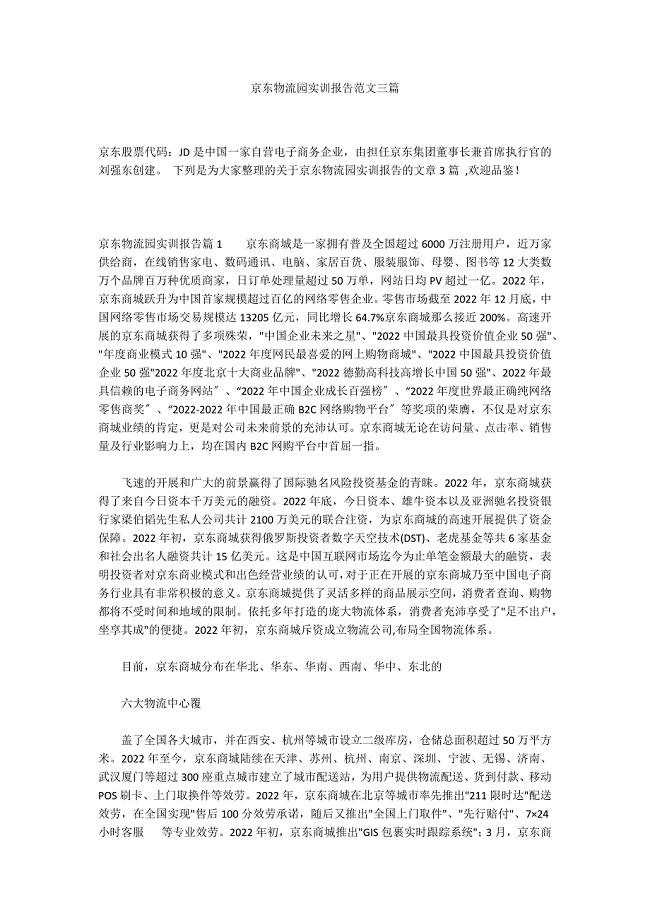
京东物流园实训报告范文三篇

【最新资料】陕西省中考数学试题及答案(Word版)
合伙型联营合同范文(5篇).doc

包工包料装修合同常用版(4篇).doc
新人教版小学数学五年级上册教学计划范文.doc
临时租赁协议实标准版(9篇)

KET词汇表(完整默写表)
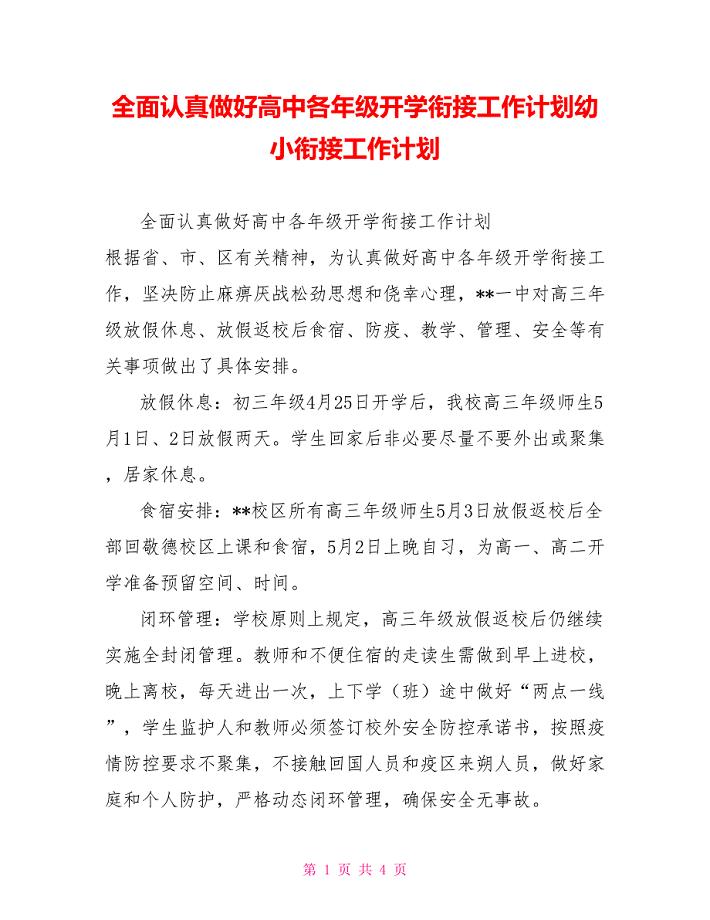
全面认真做好高中各年级开学衔接工作计划幼小衔接工作计划
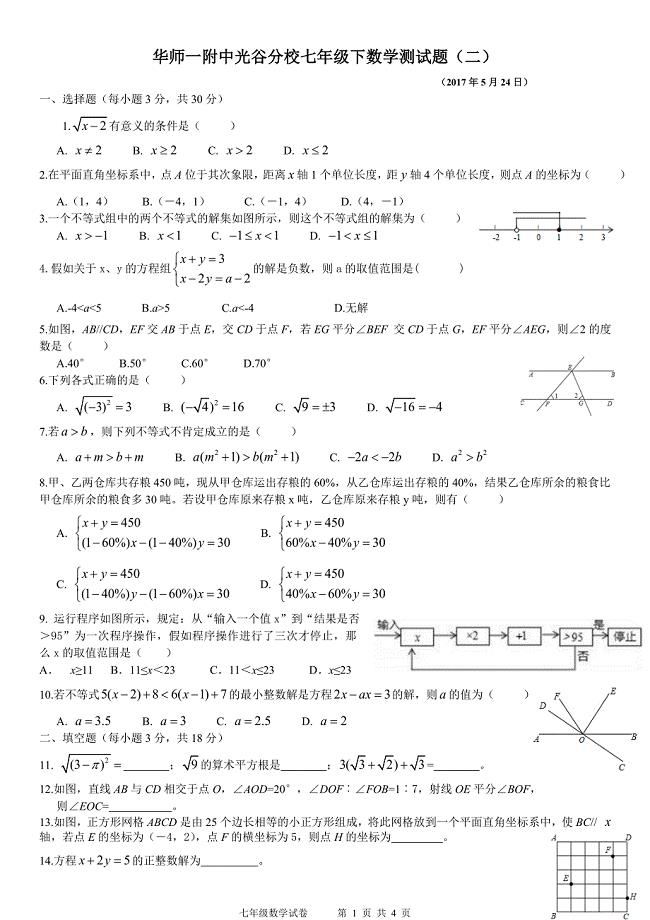
华师一附中光谷分校七年级下数学测试题(二)
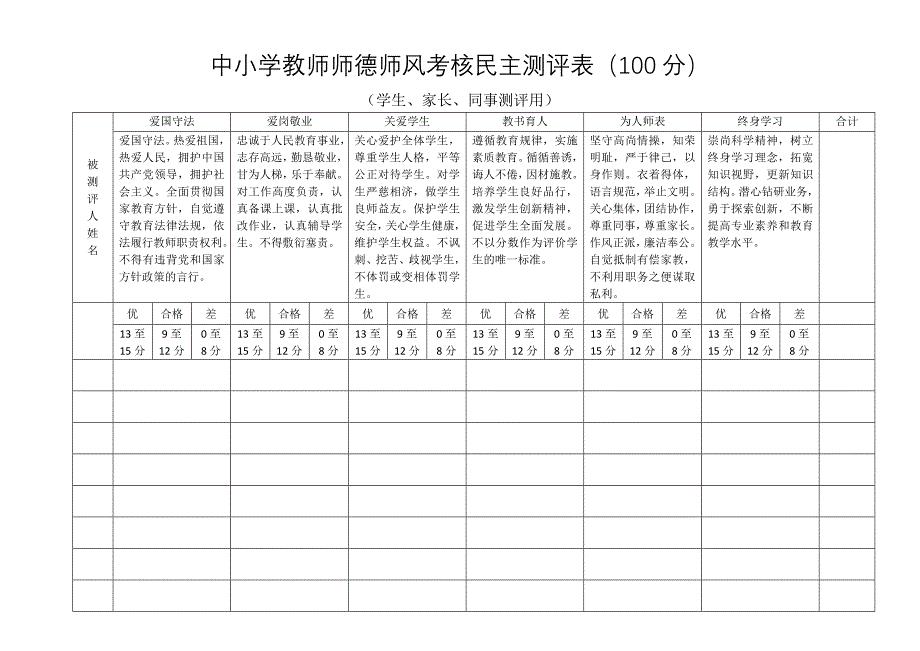
中小学教师师德师风考核民主测评表.docx
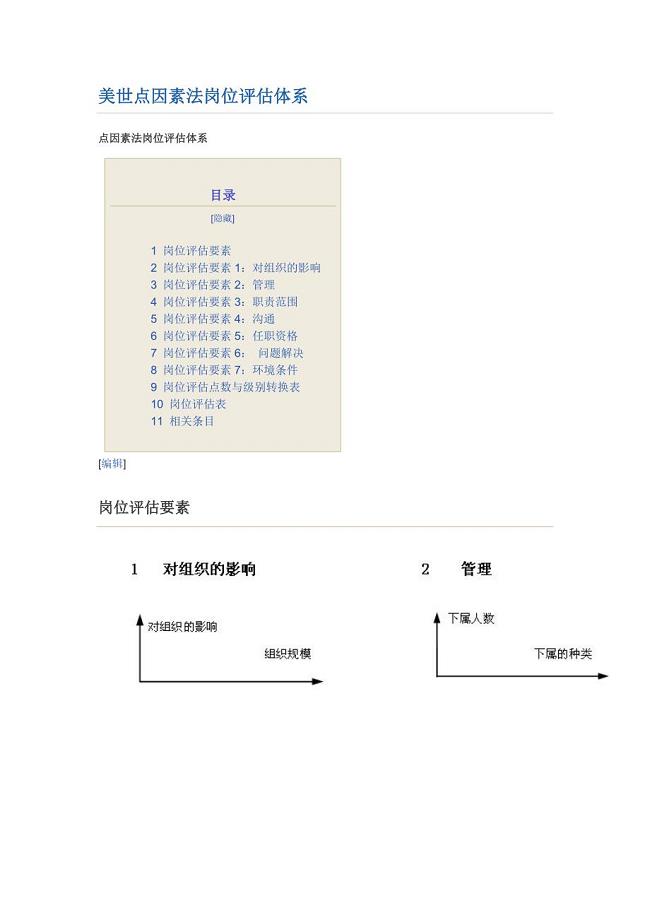
美世点因素法岗位评估体系
消防卫士优秀个人事迹(6篇)
2023年王市长讲话
公司借款合同4篇
神经生物学复习题答案
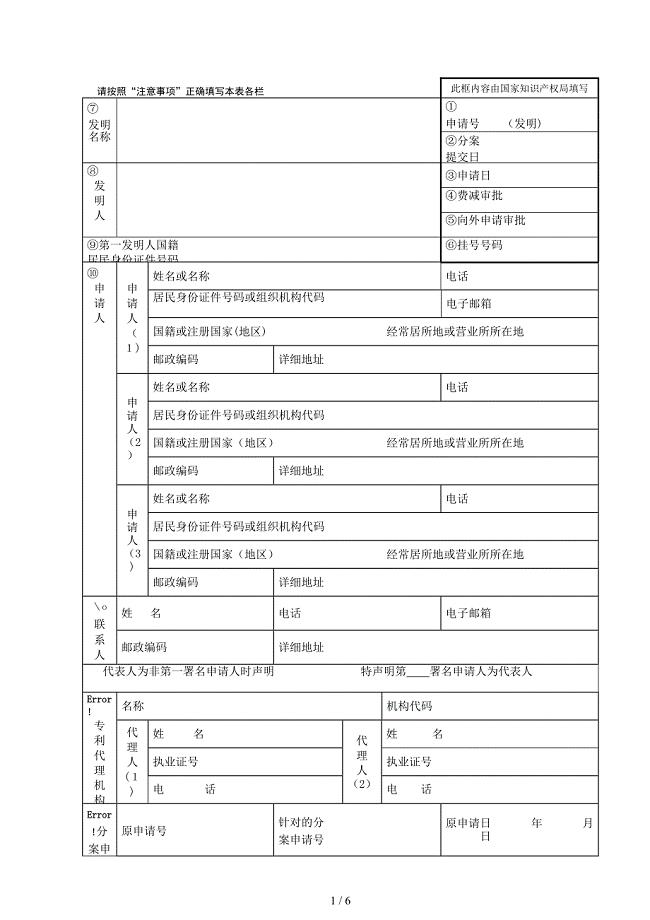
发明专利请求书47967

劳务协议简易样本(九篇)
幼儿交通安全活动方案(三篇)
廉洁工作总结4篇

转速、电流反馈控制直流调速系统仿真
 基于单片机的多功能计步器
2023-03-24 22页
设计师的名言
2022-08-03 5页
体育课教学方案设计.doc
2023-01-05 3页
年报企业财务状况分析格式
2023-09-12 3页
关于幻想演讲稿汇编六篇
2024-02-11 17页
有关简洁辞职报告汇总九篇
2023-07-26 10页
品管部各职位职责
2023-07-12 5页
软件项目实施管理流程图
2022-11-12 2页
常见习惯性违章行为
2023-11-29 6页
幼儿园美工活动方案精编5则范文(3篇)
2023-11-24 10页